How to Manage Products
Transaction Items Setup Guide
In CRM Dance, transaction items refer to both Products and Expenses. Correctly configuring these items is essential to ensure your financial data is recorded accurately and the auto-fill feature works flawlessly.
Why Configure Transaction Items?
- Accurate Auto-fill: Proper setup enables auto-fill to work seamlessly, reducing manual input and potential errors.
- Clear Financial Reporting: Differentiating between product (income) and expense items ensures that your payments report reflects true revenue and expenses.
- Streamlined Management: Easily edit, delete, or review transaction items to keep your financial data current.
How to Set Up Transaction Items
Step 1: Access Financial & Integration Settings
-
Log In to CRM Dance: Open your CRM Dance account.
-
Navigate to Settings: Click on the Settings option in your main menu.
-
Select Financial & Integration Tab: At the top of the Settings page, select the Financial & Integration tab.
- Tip: A preview of some transaction items will be visible here.
Step 2: Explore All Transaction Items
-
Click on "Explore All": In the preview area, click the Explore All button to open the dedicated transaction items page.
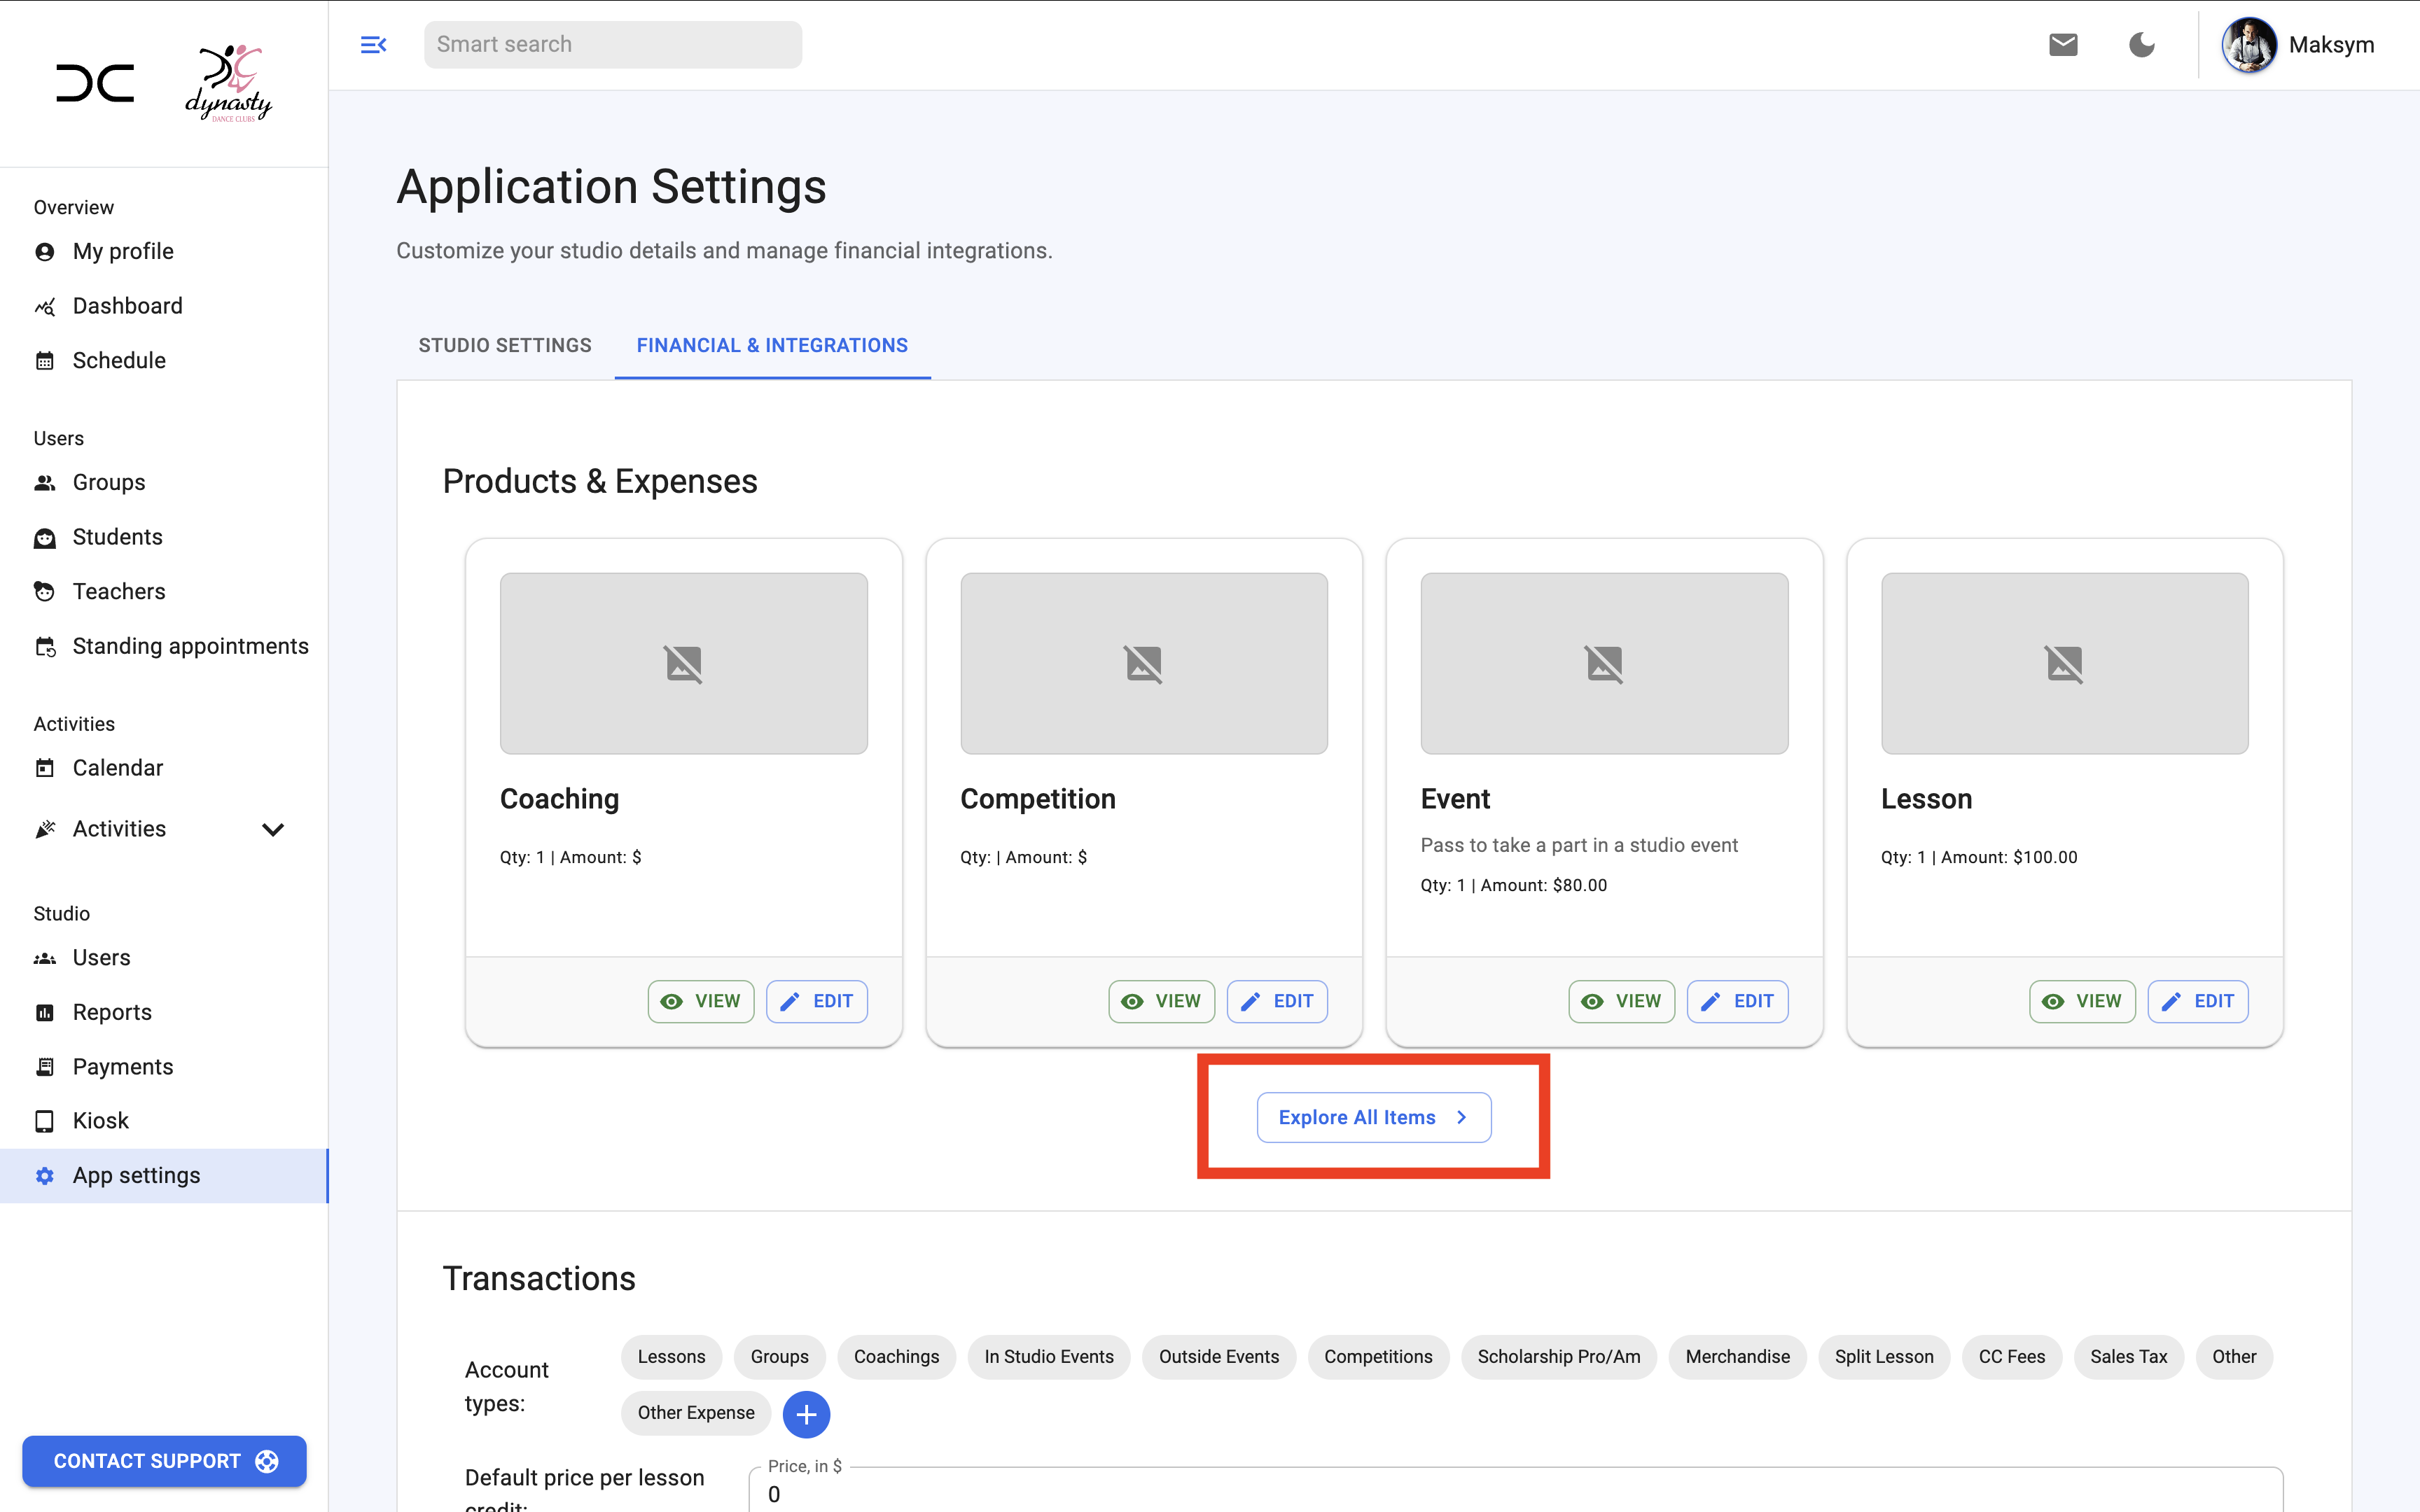
-
Review the Page: This page lists all transaction items, allowing you to edit, delete, or view details.
Step 3: Edit Transaction Items for Auto-fill
-
Locate the Products Section: On the dedicated page, find the section for Products (which are transaction items marked as income).
-
Click the Edit Button: Click on the Edit button next to a product item to update its values.

Screenshot: Explore All Button
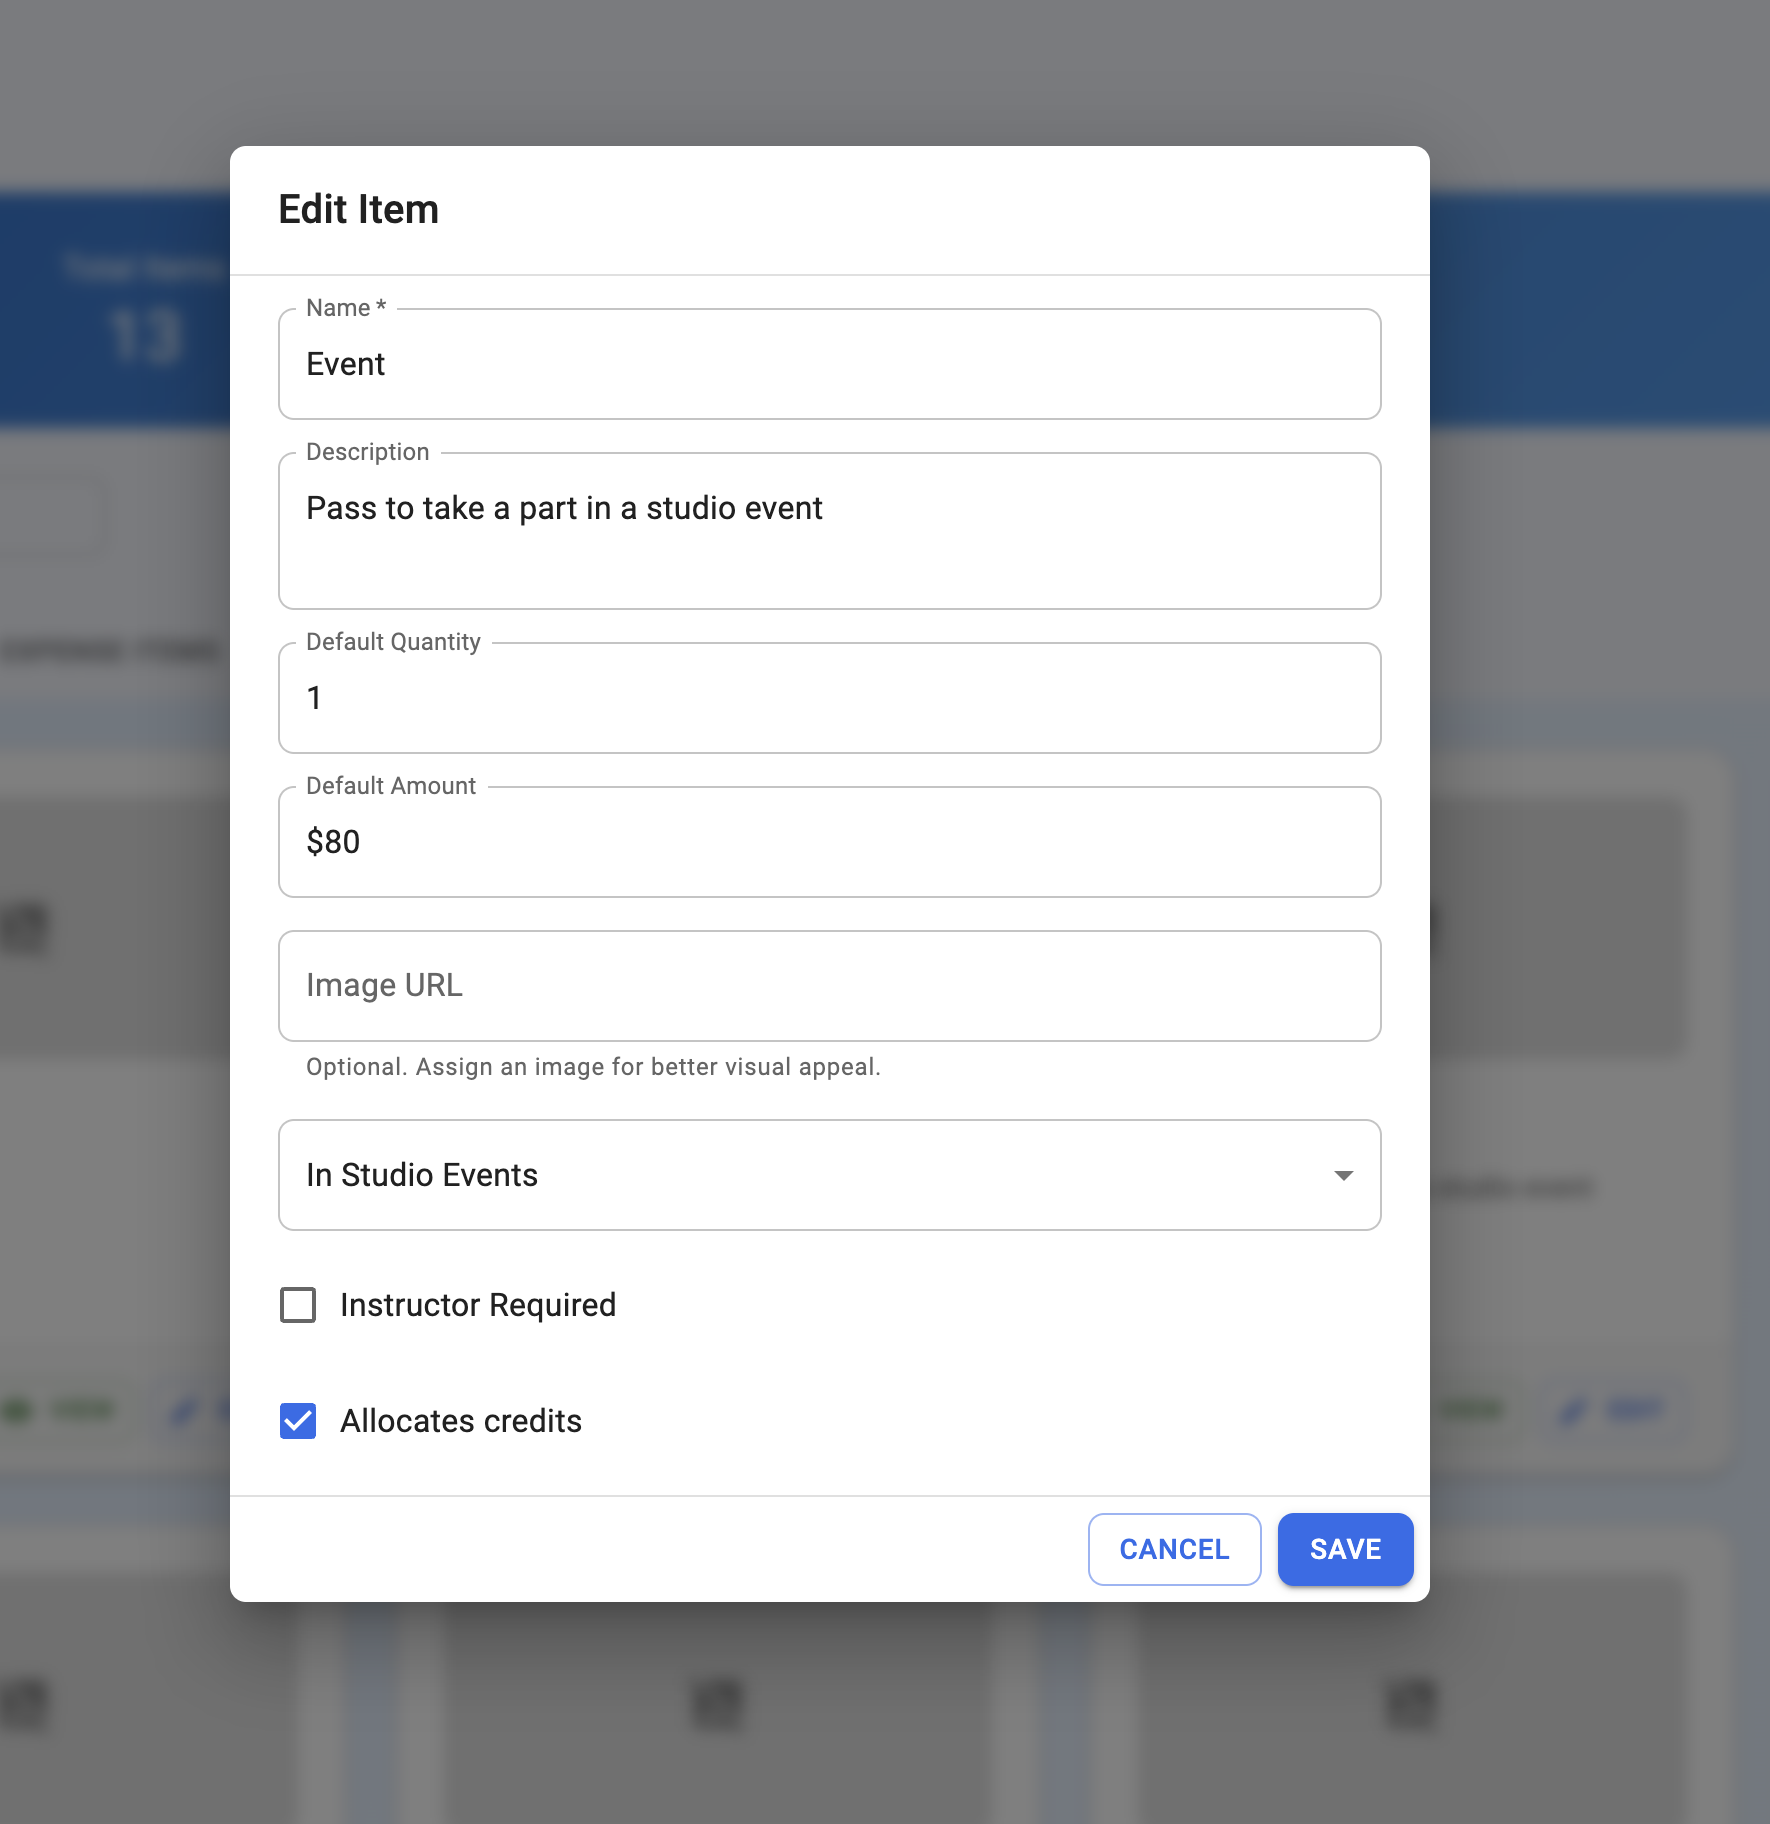
Screenshot: Modal Window to Edit Transaction Item
Step 4: Test Auto-fill
After setting up your transaction items, it’s crucial to confirm that the auto-fill feature is working as expected. Follow these steps:
-
Choose Transaction Item for Transaction When creating a new transaction, select the appropriate transaction item from the dropdown menu.
-
Choose Transaction Item from Modal When the modal appears, pick the desired transaction item to proceed with your selection.
-
See Auto-filled Columns Verify that the form’s fields are automatically populated with the correct data (e.g., pricing, description).
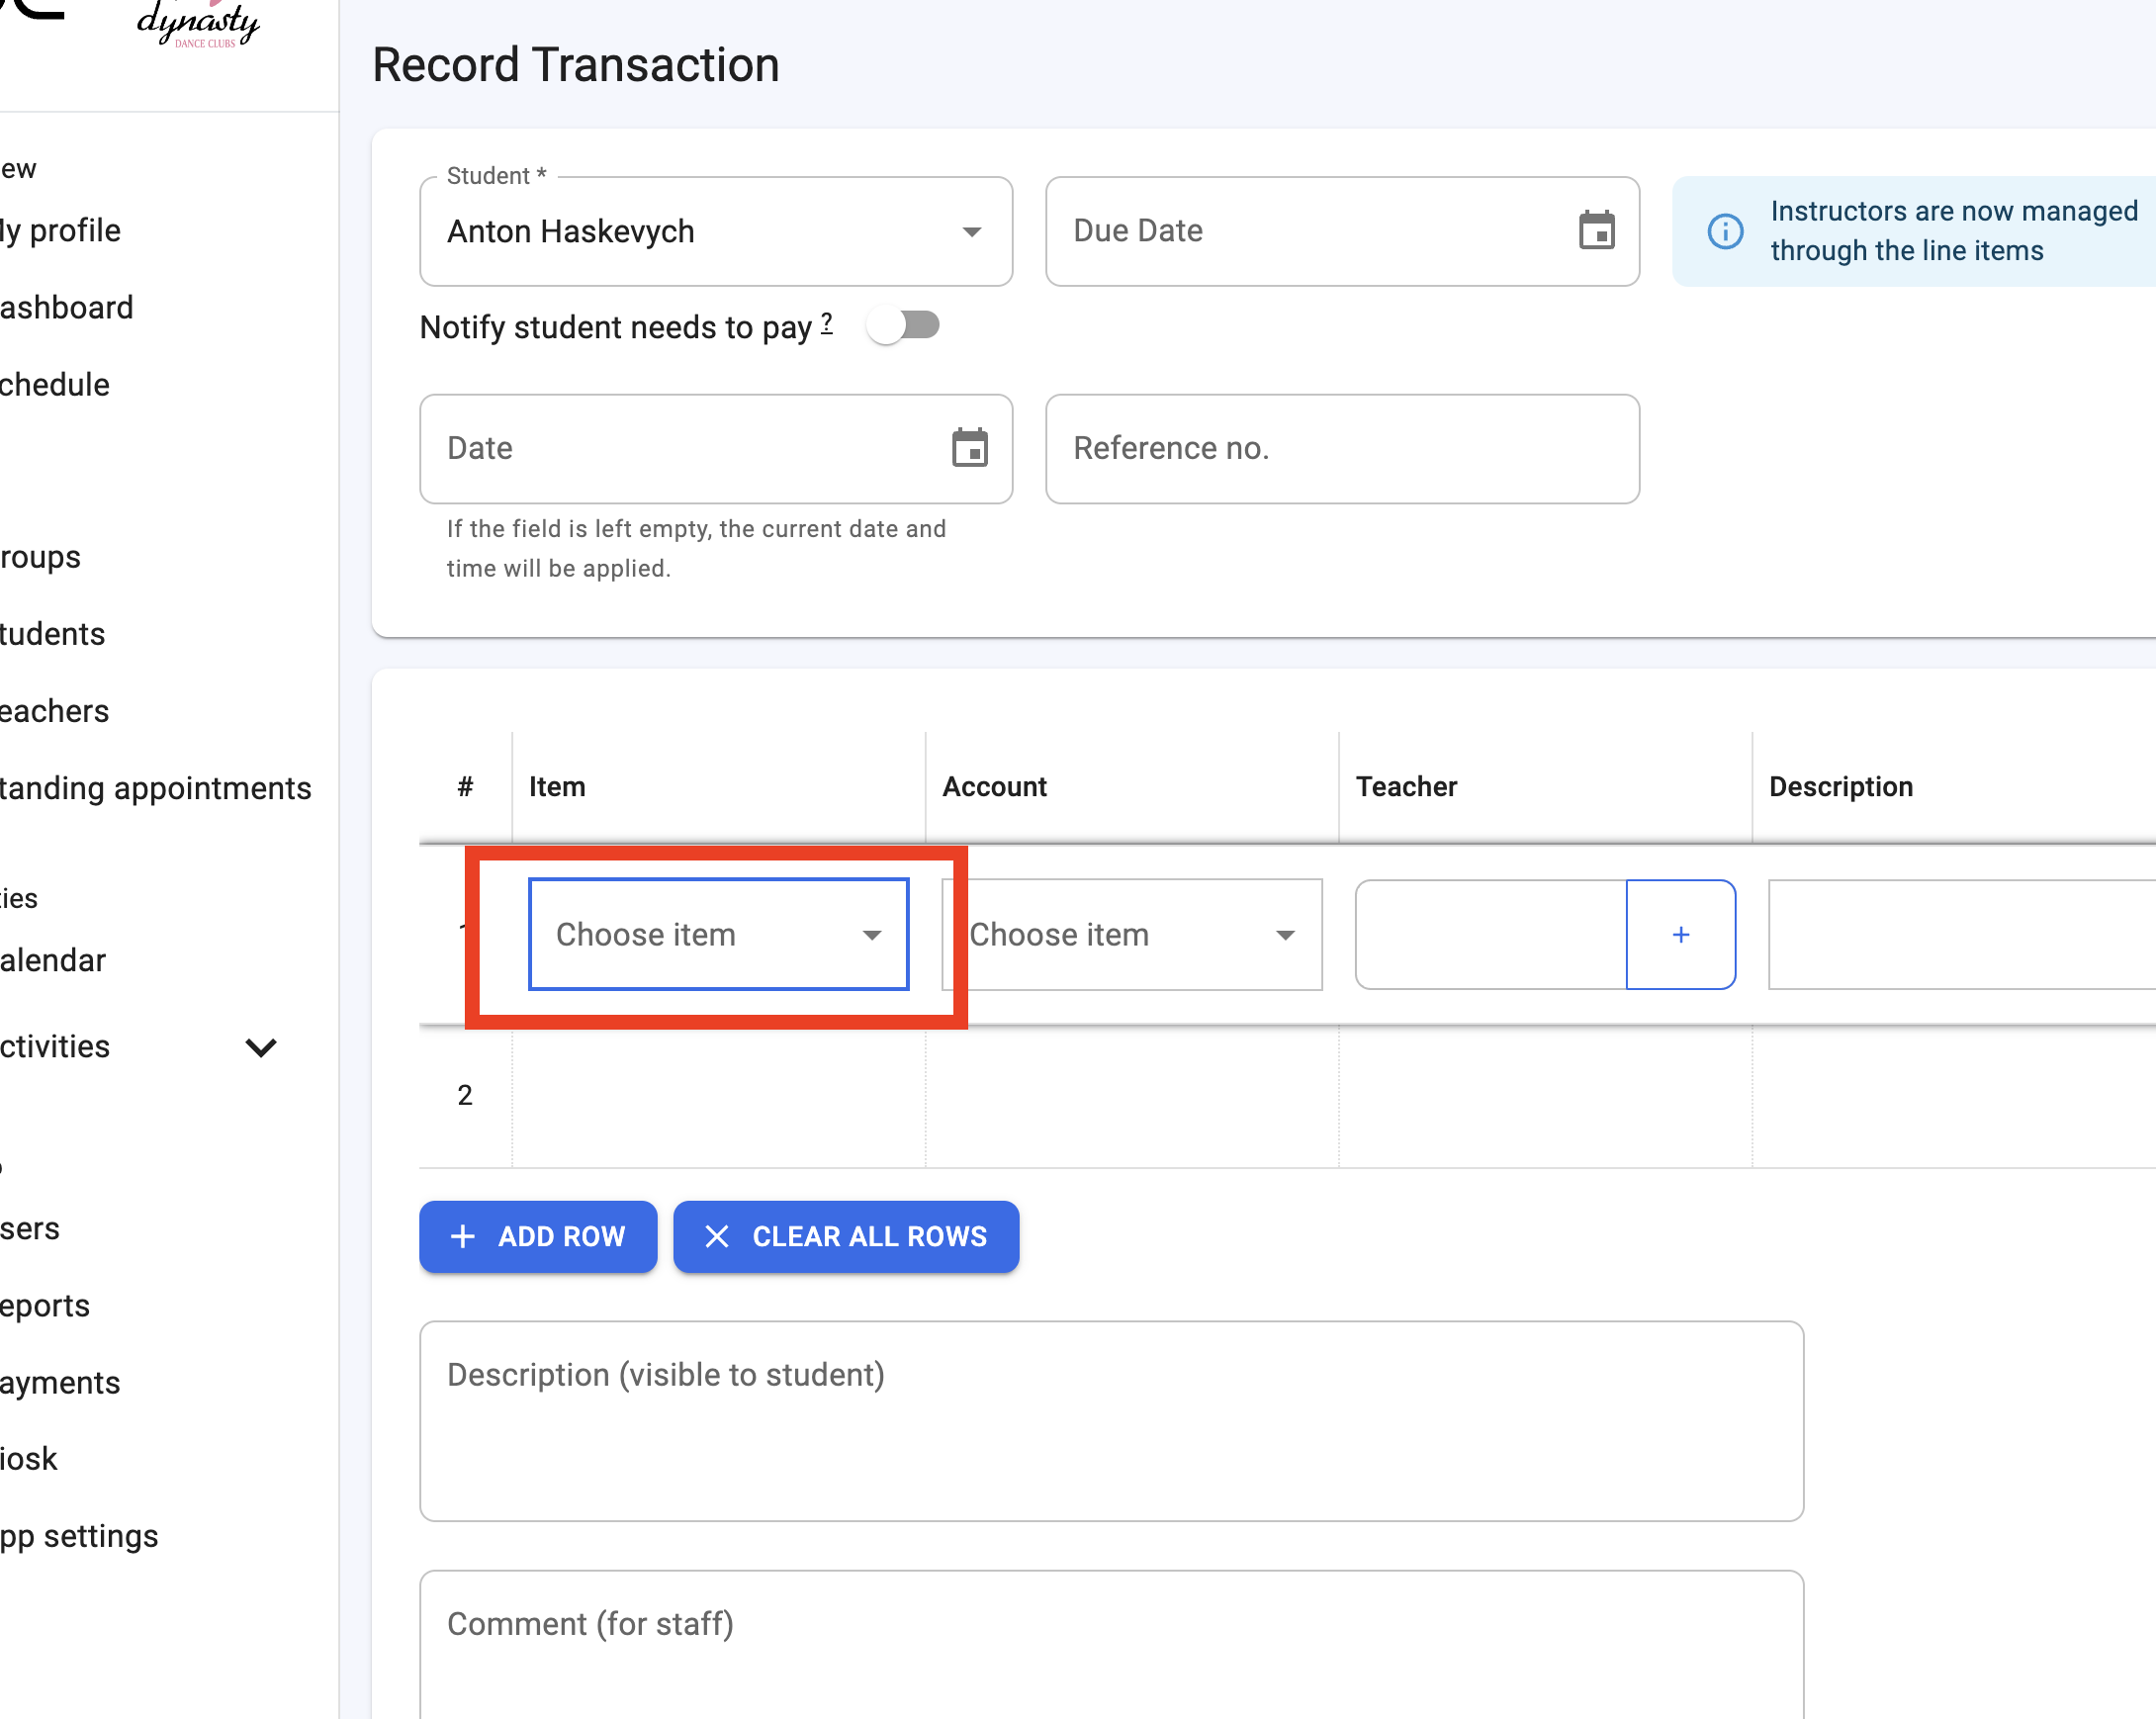
Choose Transaction Item for Transaction
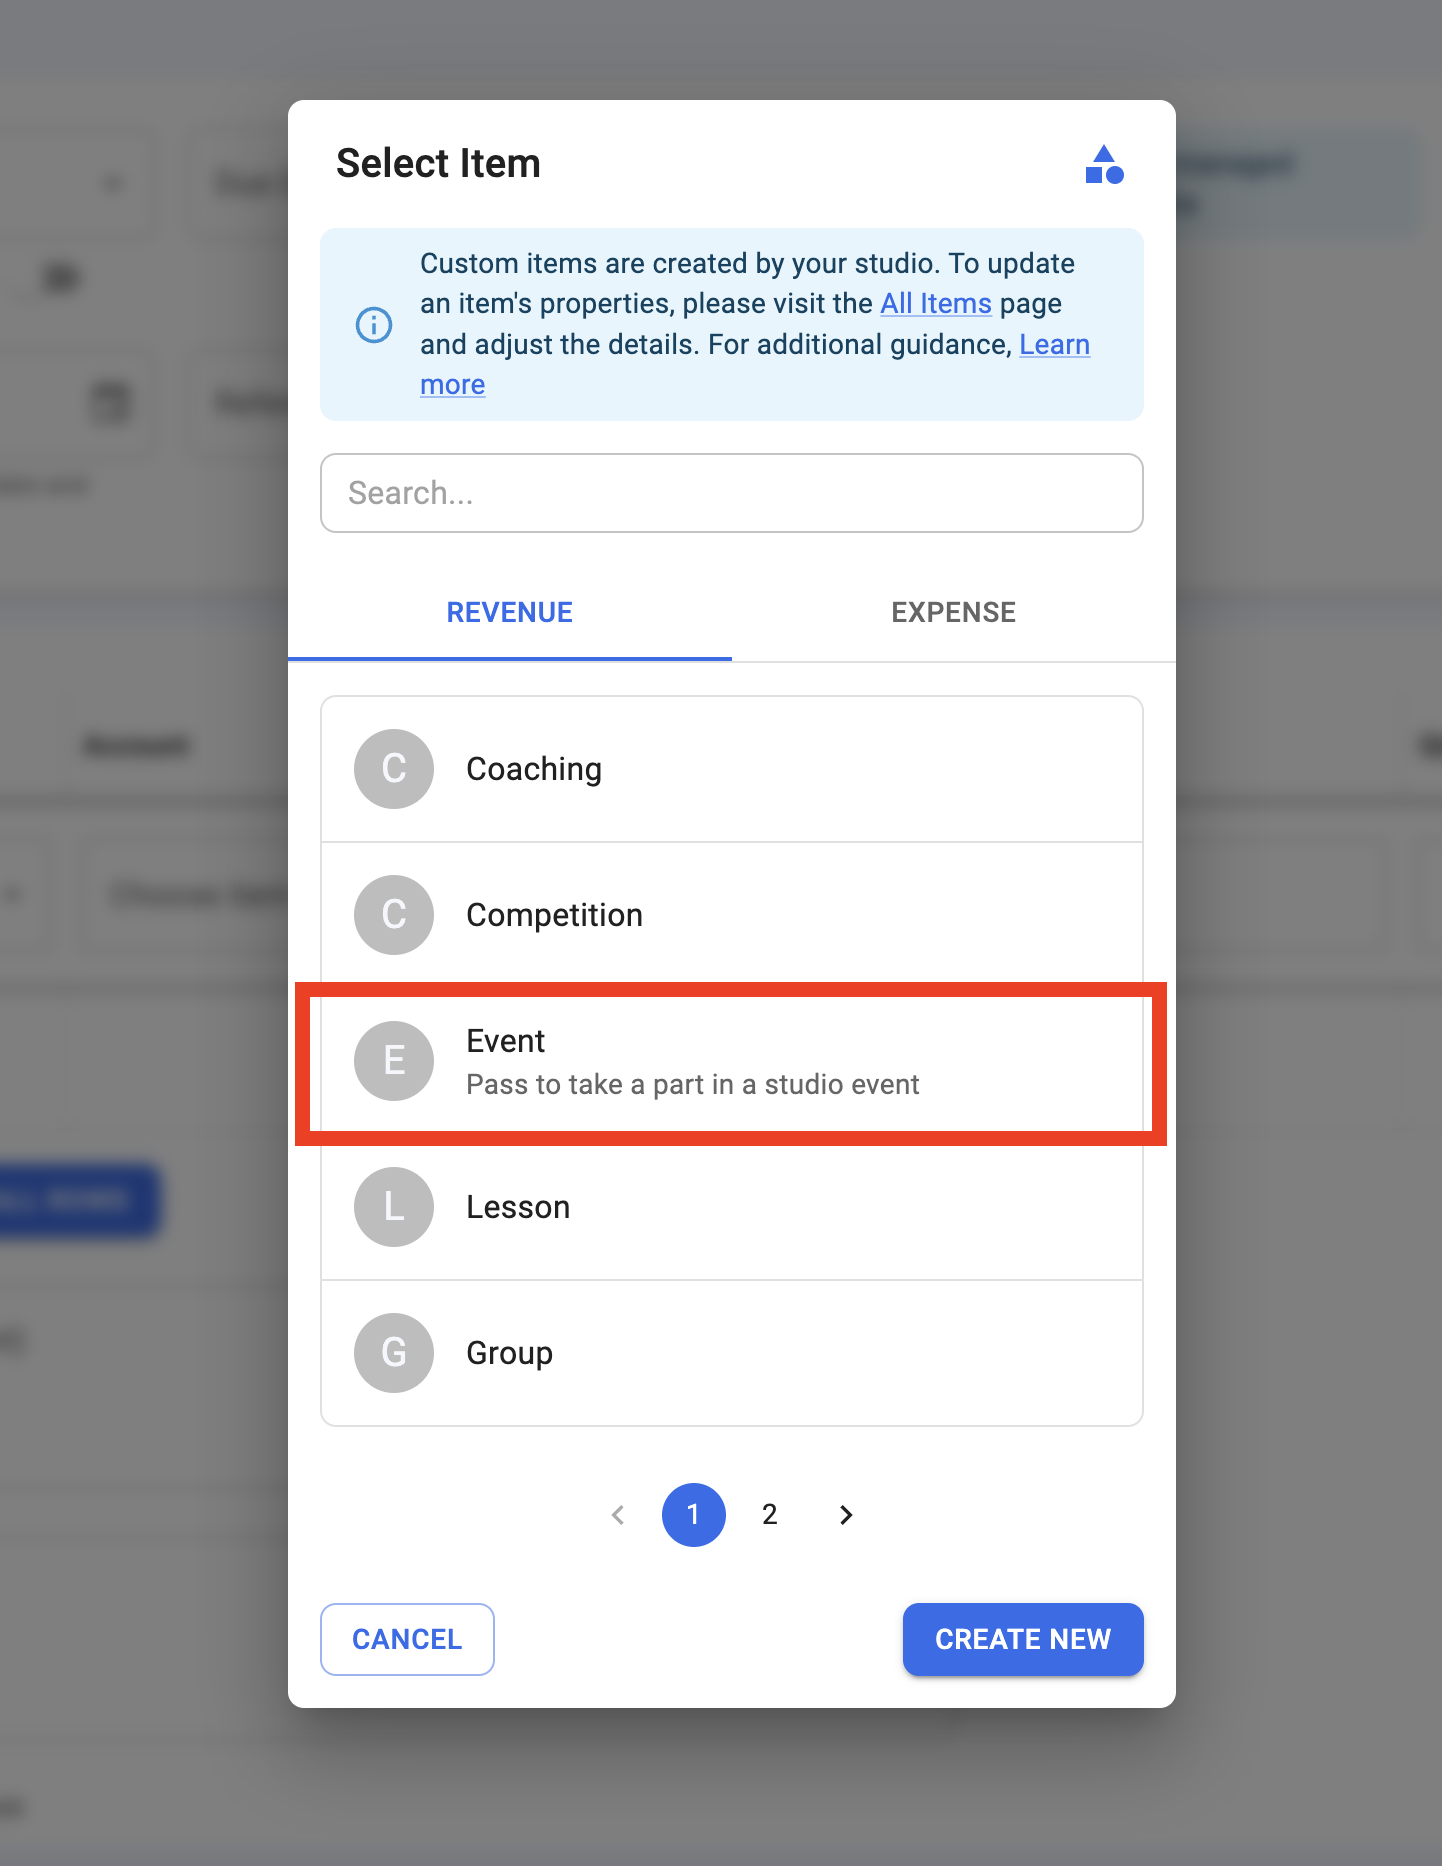
Choose Transaction Item from Modal
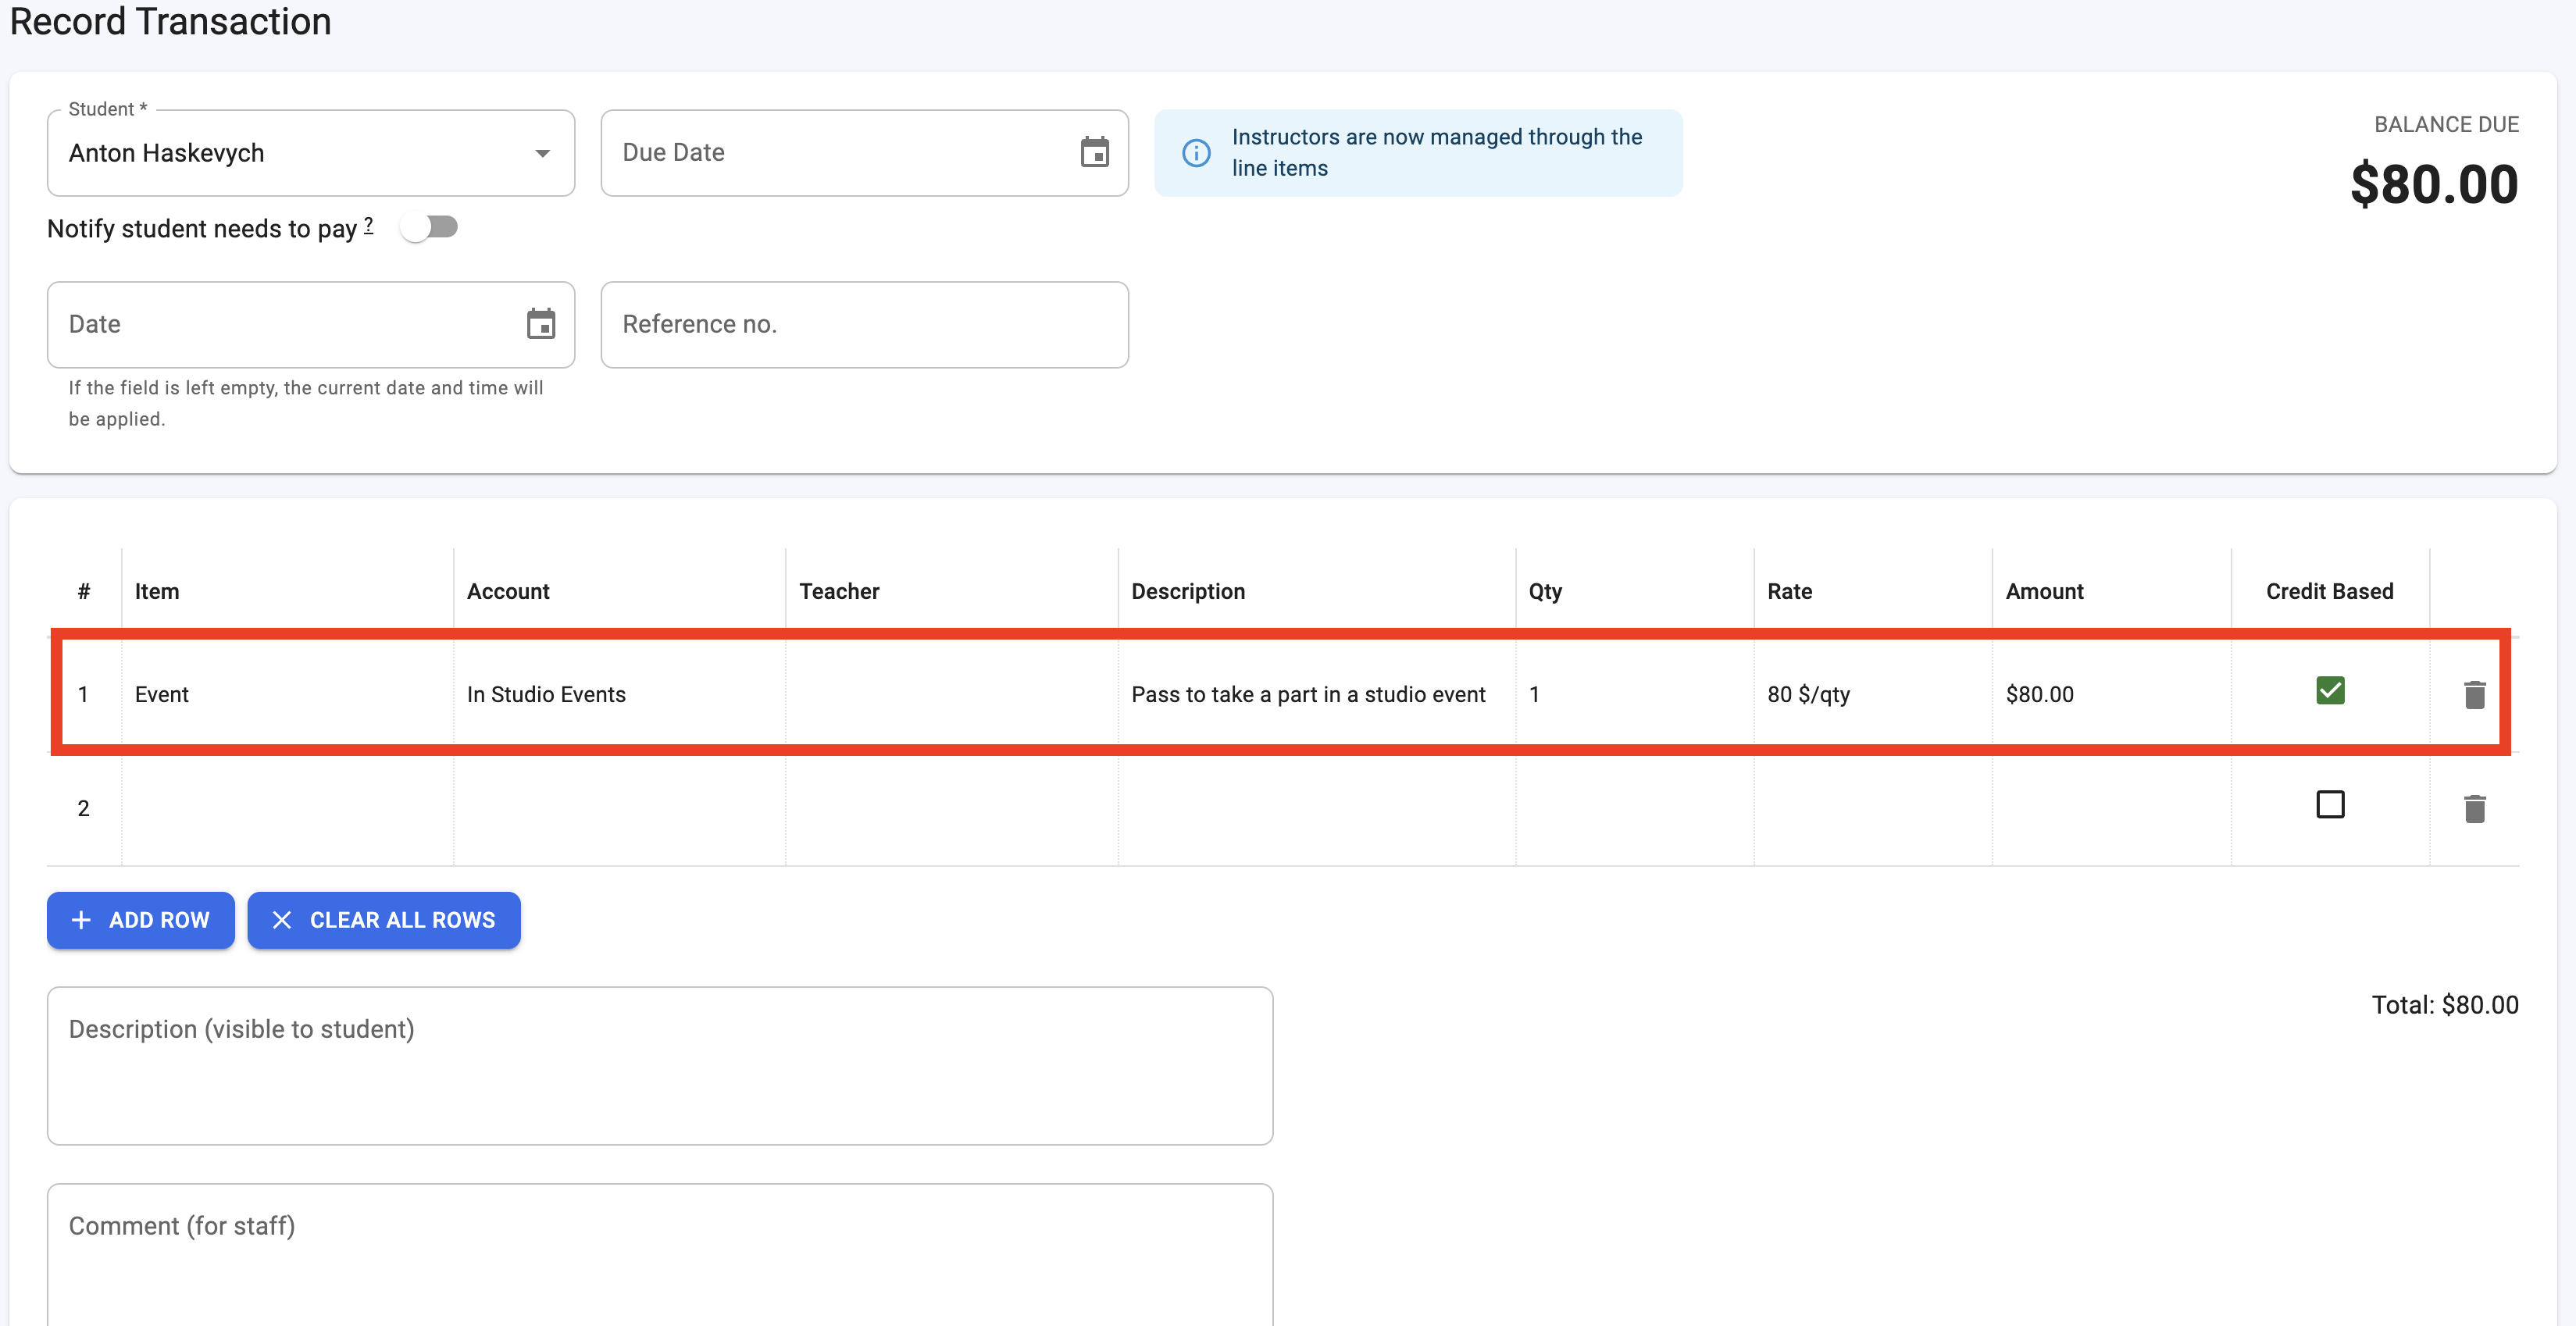
See Auto-filled Columns
Understand the Financial Impact
-
Product Items: When a transaction includes a product item and a payment is recorded, it is shown as income in the payments report.
-
Expense Items: When an item from the expense category is added to a transaction, it will appear as an expense and will not count as revenue.
-
Reporting Calculation:
-
The final total is computed as: Total = Revenue + Expenses

Conclusions
By following this guide, you'll ensure that your transaction items are set up properly, enabling CRM Dance to accurately reflect your revenue and expenses. This setup not only improves the auto-fill experience but also keeps your financial reporting precise and reliable.
If you have any questions or need furthe
Need personalized support?
We are dedicated to ensuring your success and providing the best possible experience. If you have any questions or need assistance, our team is here to help you make the best decisions for your studio.
Contact Us