How to manege transactions
Transactions & Payments in CRM Dance
Overview
In CRM Dance, transactions and payments help track student charges and payments. A Transaction records a student's owed amount, while Transaction Lines break it down into specific items and costs. When a student makes a payment, a Payment is recorded and linked to the transaction. Additionally, a Credit Balance can be added for prepaid amounts, which can be used for future transactions. This system ensures accurate financial tracking and student balance management.
Creating a Transaction
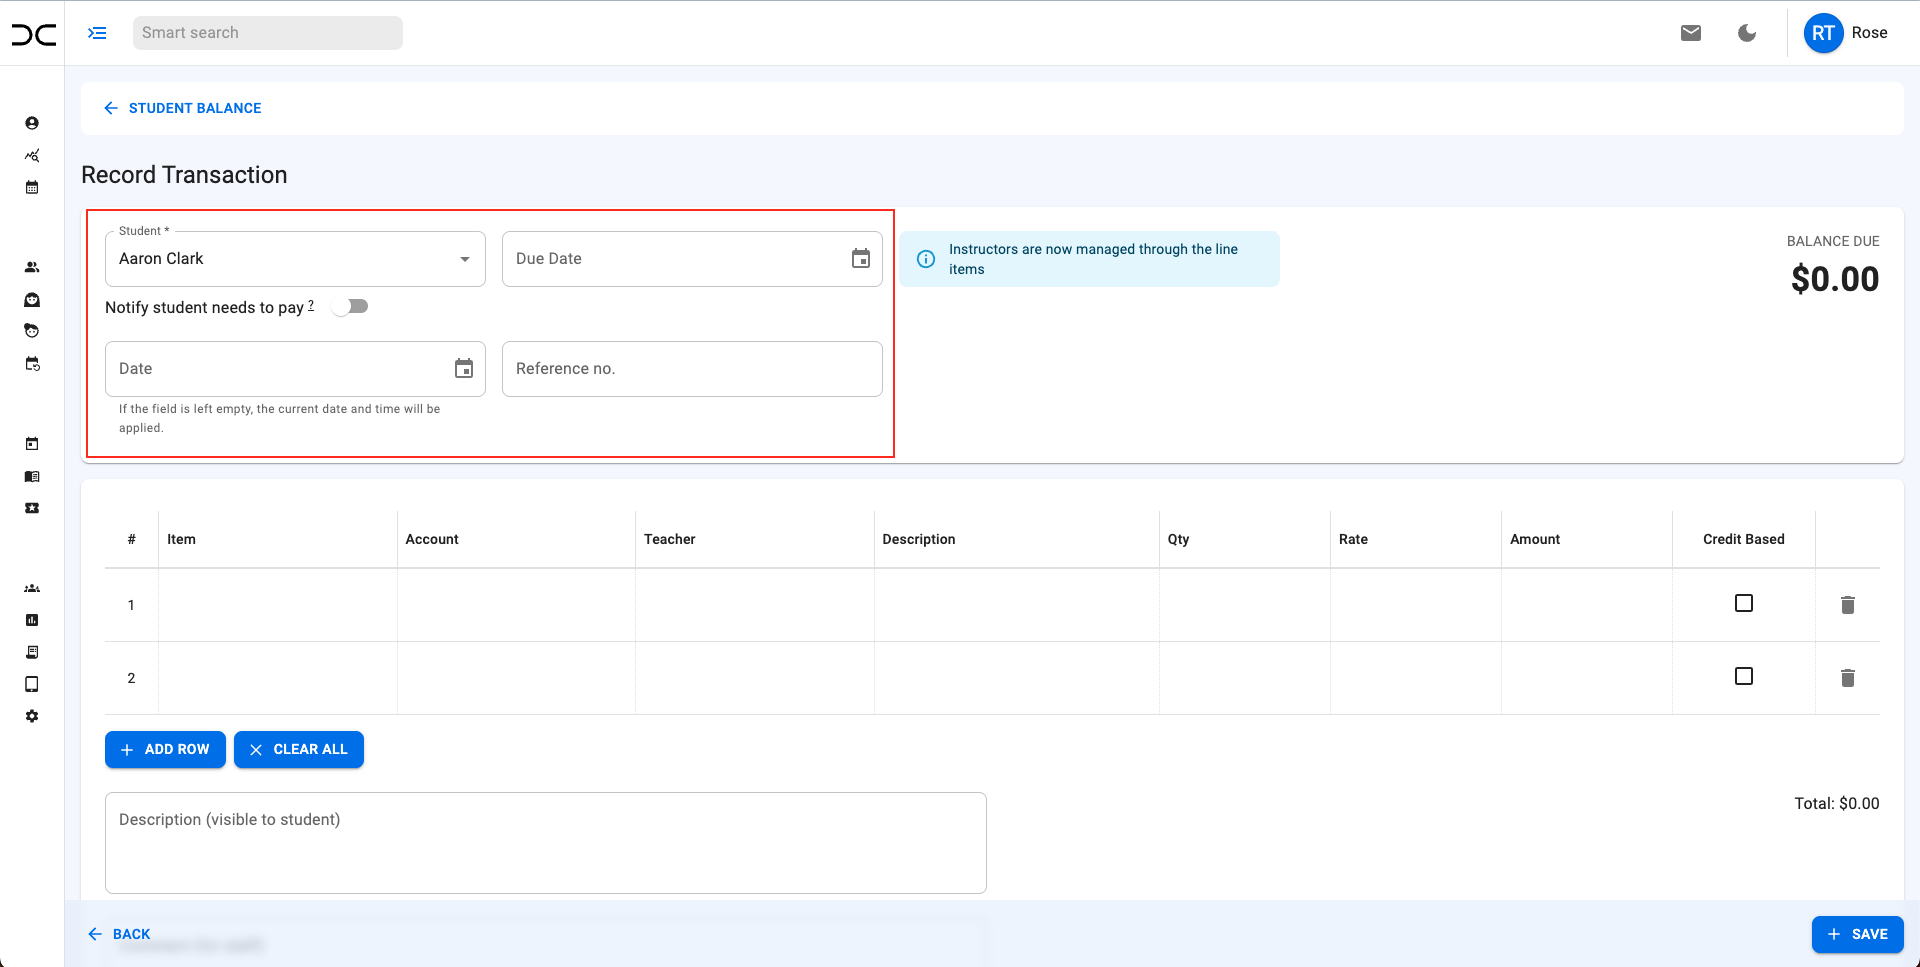
To create a new transaction, follow these steps:
-
Log in to CRM Dance.
-
Navigate to the student's profile.
-
Open the Accounts tab.
-
Click New Action → Transaction.

-
Fill in the required fields for the transaction.
-
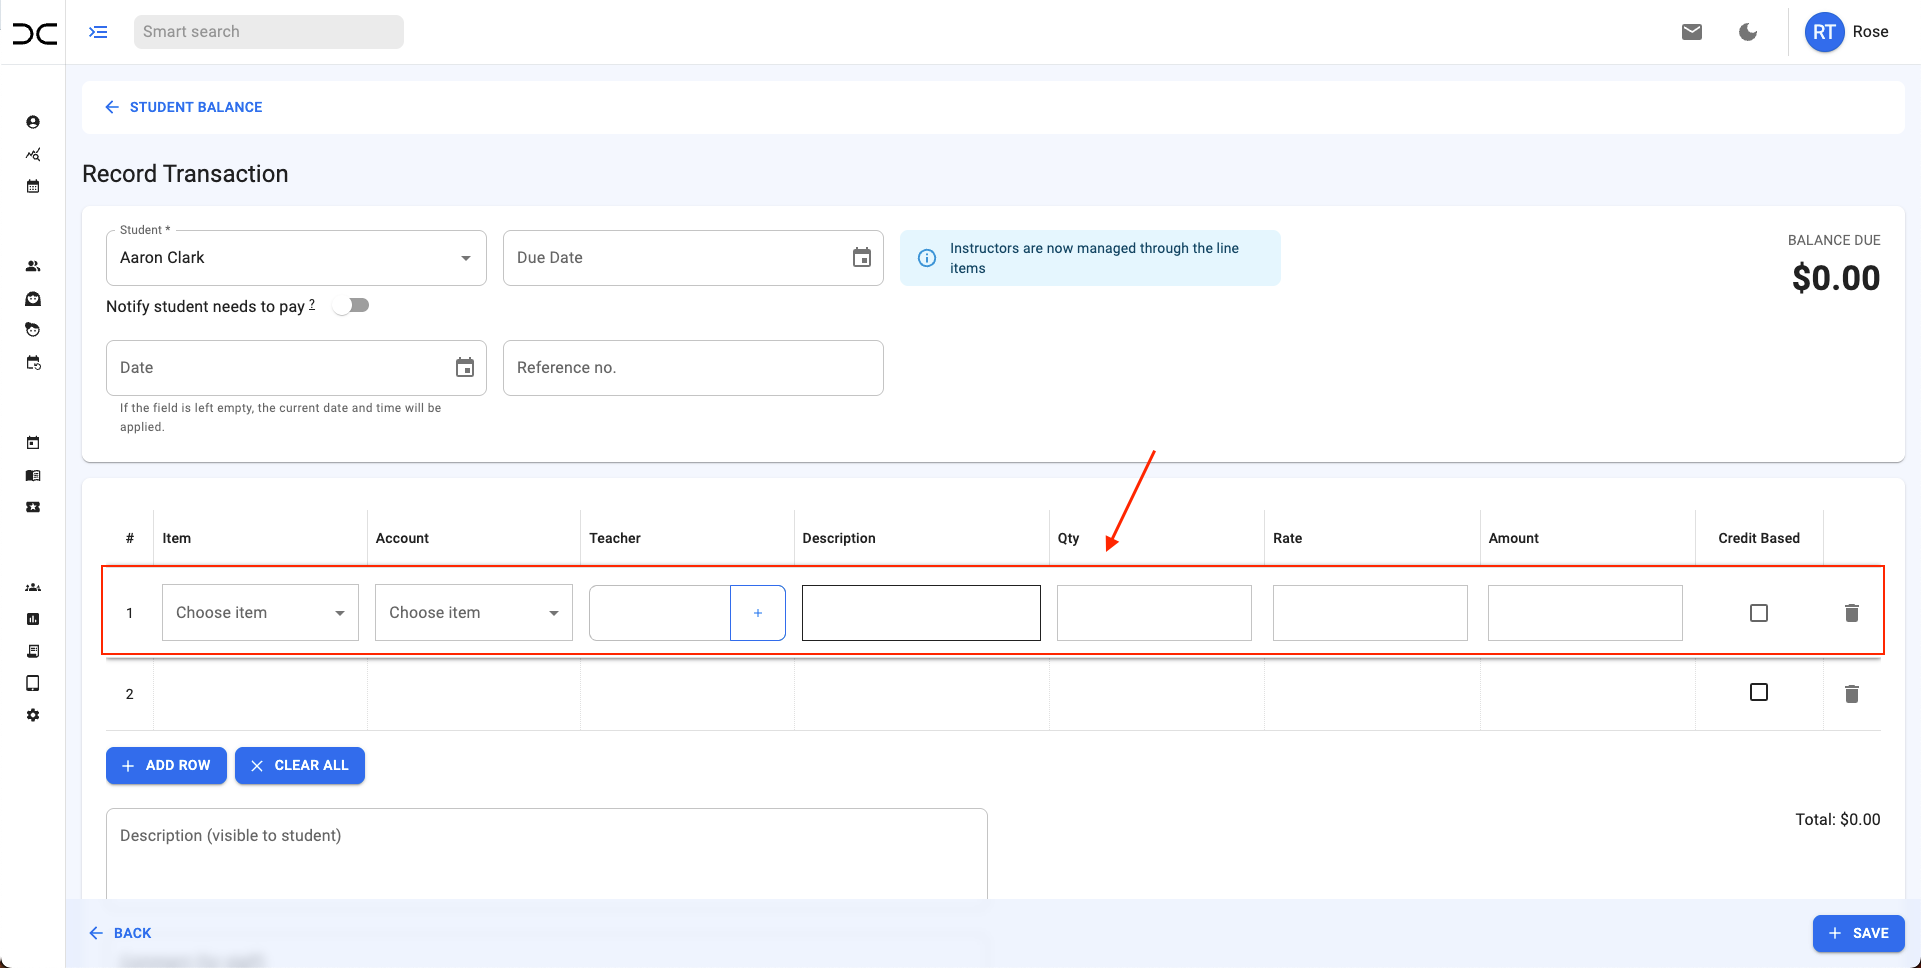
Add a transaction line, specifying:
- Item (the service or product being charged)
- Account (account balance being changed)
- Instructor
- Quantity
- Rate
- Amount
- Credit-based option (Yes/No)
-
Click Save.
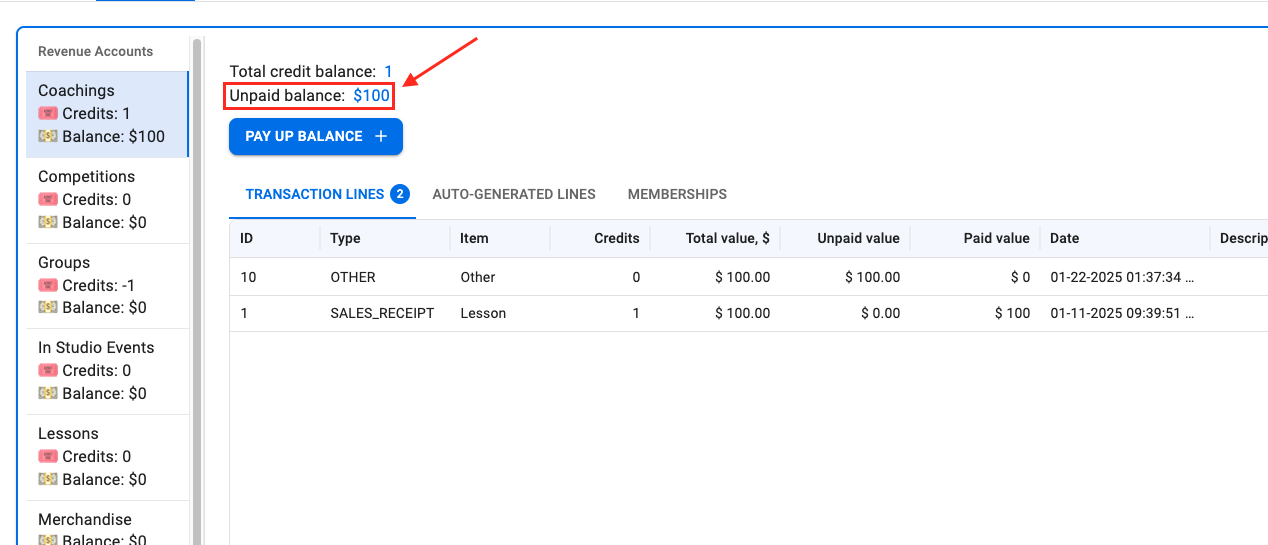
Impact on Student Balance
After creating a transaction, the student’s unpaid balance will equal the total transaction amount. This means the student owes the studio the amount specified in the transaction.
How Can a Student Pay for a Transaction?
Payments are recorded using the Payment entity. Payments track when and how a student settles their balance. Each payment includes Payment Lines, which are linked to specific Transaction Lines, ensuring accurate tracking.
Adding a New Payment
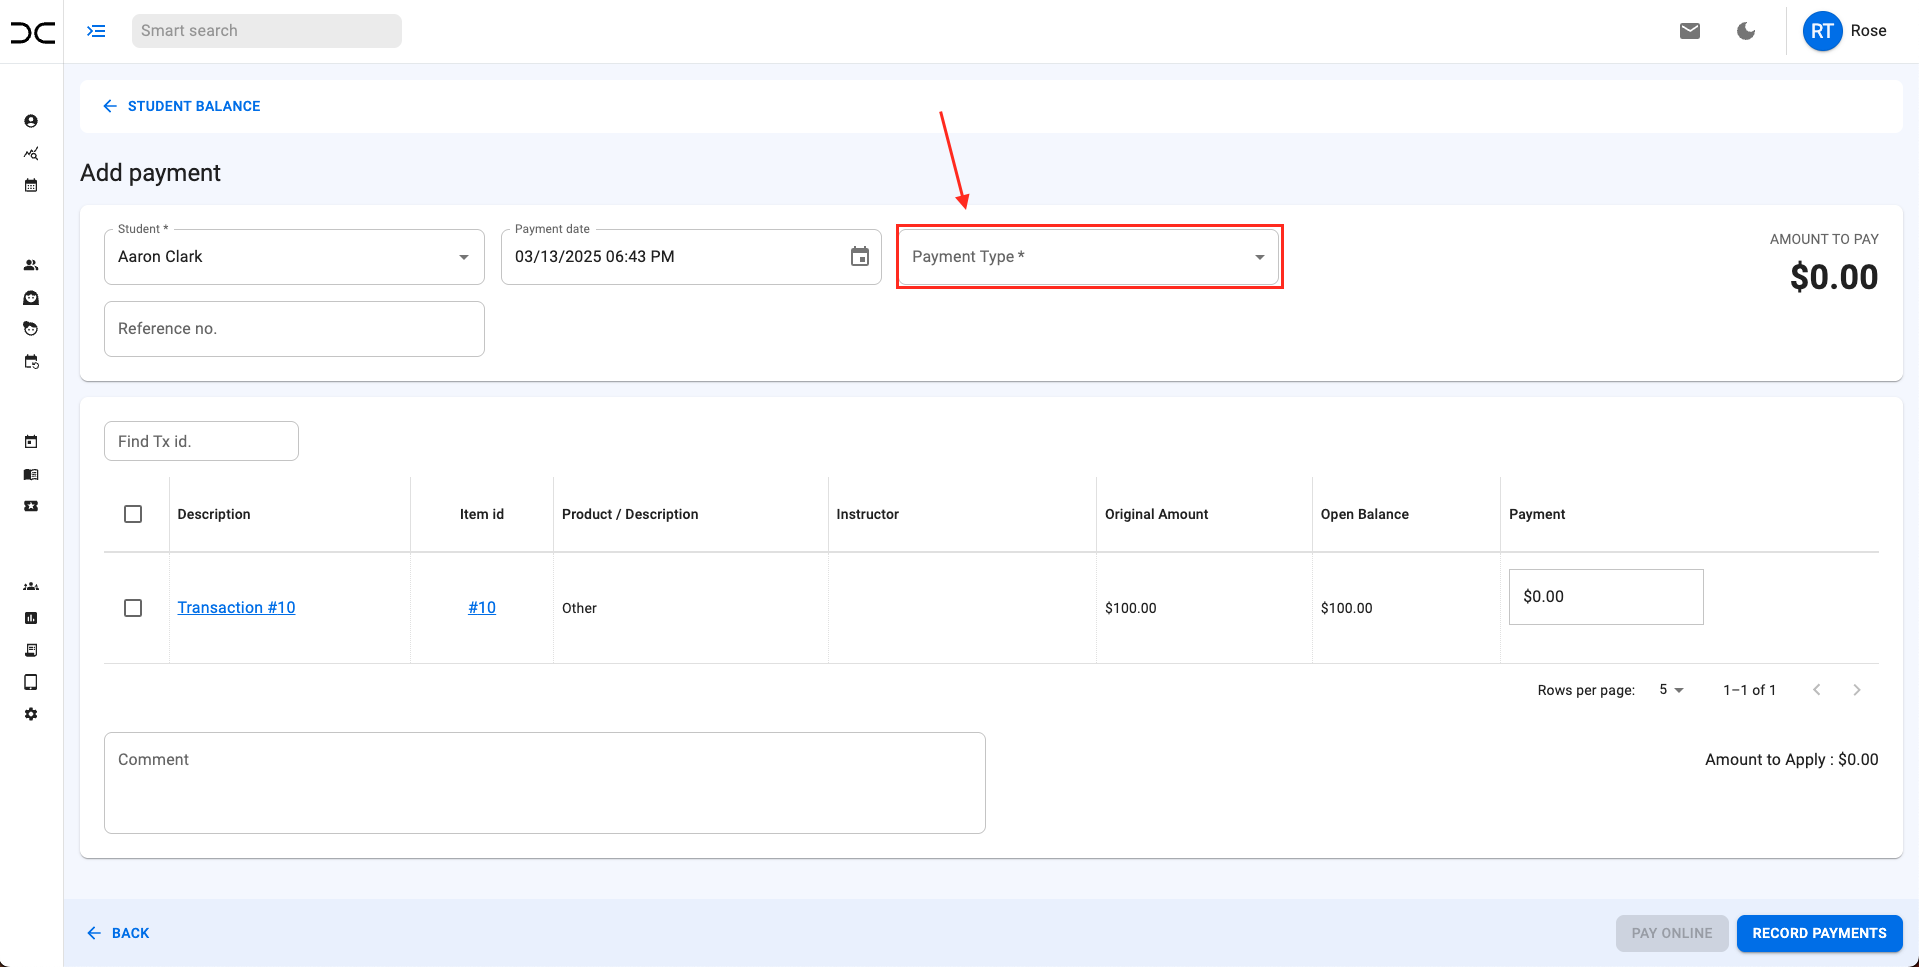
-
Log in to CRM Dance.
-
Navigate to the student’s profile.
-
Open the Accounts tab.
-
Click New Action → Payment.
-
Fill in fields and select a Payment Type (this is required).
-
Enter the payment amount in the appropriate payment line.
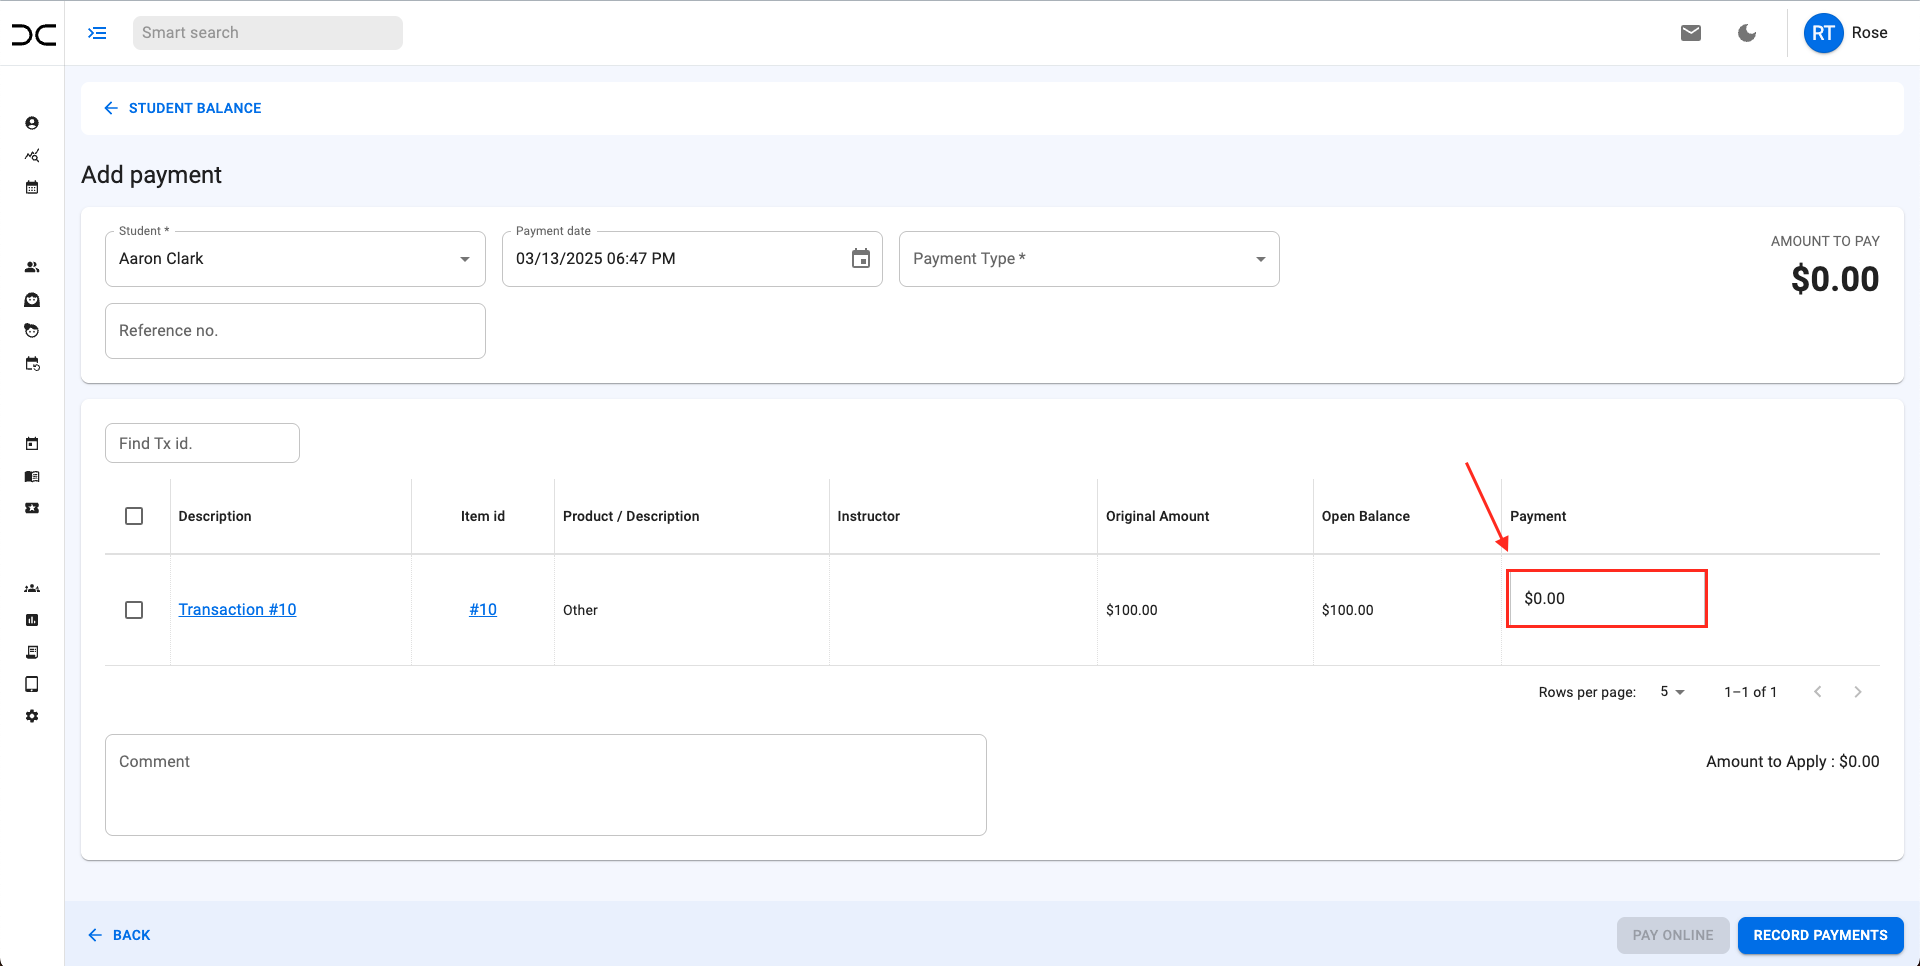
-
Click Record Payment.
Impact on Student Balance
The student’s unpaid balance will update as follows:
Unpaid Balance = Total Transactions - Total Payments
Once the full amount is paid, the student's unpaid balance will be zero.
Sales Receipt: Automatic Payment Creation
A Sales Receipt functions similarly to a transaction but automatically creates a corresponding payment for the same amount.
Steps to Create a Sales Receipt:
-
Log in to CRM Dance.
-
Navigate to the student’s profile.
-
Open the Accounts tab.
-
Click New Action → Sales Receipt.
-
Fill in the required details and save.
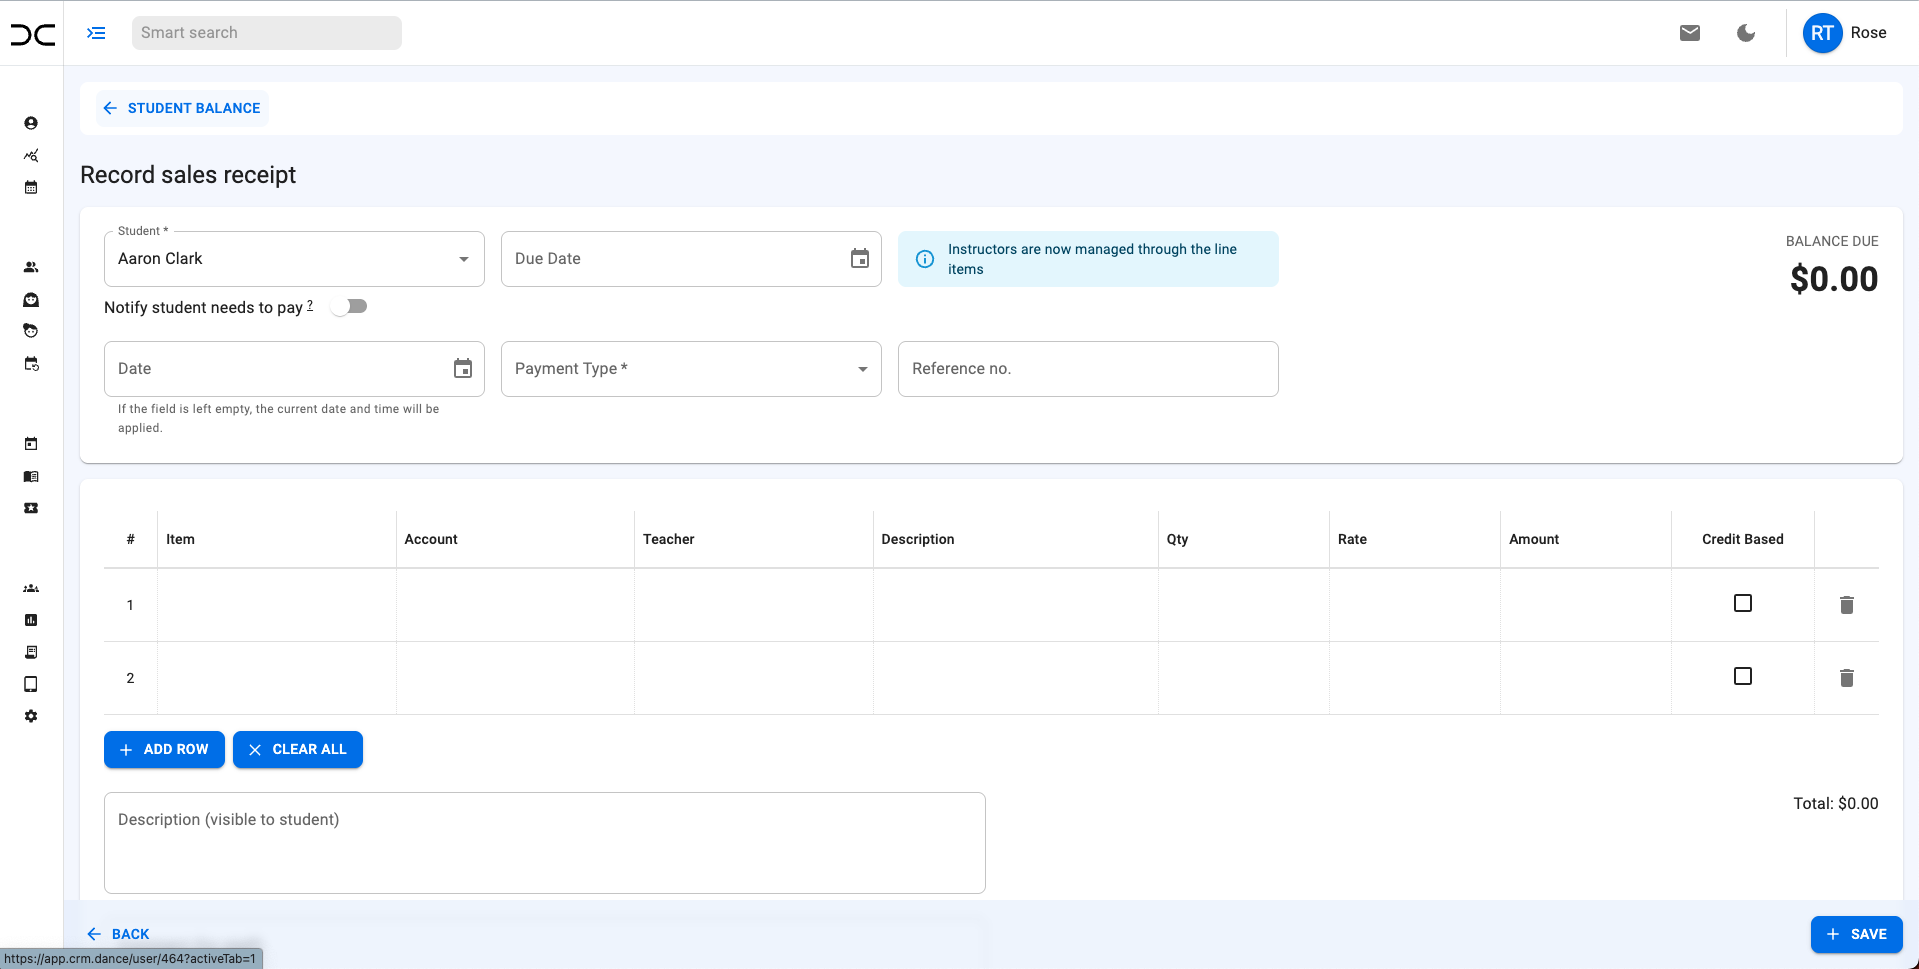
What Happens?
- A transaction is created as usual.
- A payment is automatically generated for the same amount.
- The student's balance updates accordingly.
This is useful when a student is paying immediately at the time of the transaction.
Credit Balance: Preloading Funds
A Credit Balance allows a student to prepay an amount, which can be used for future transactions.
Adding a Credit Balance:
-
Log in to CRM Dance.
-
Navigate to the student’s profile.
-
Open the Accounts tab.
-
Click New Action → Credit Balance.
-
Enter the desired amount in the Value field.
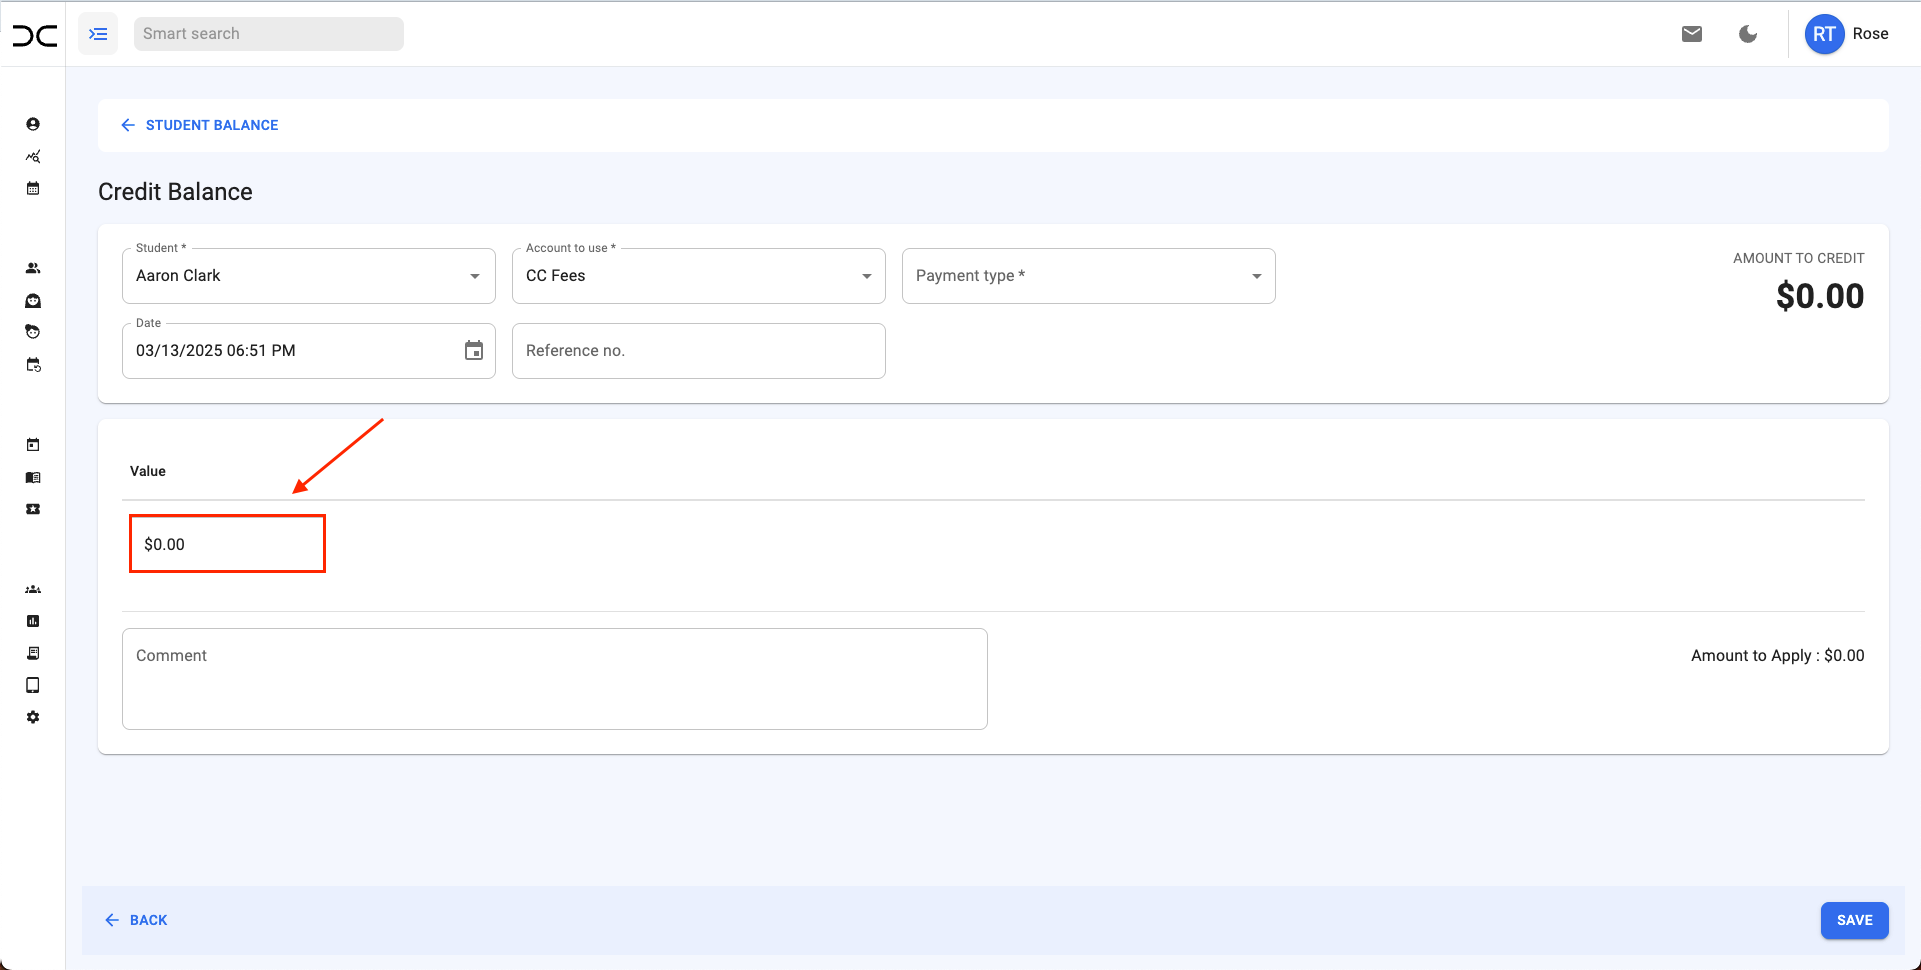
-
Click Save.
How It Works
- The credited amount is added to the student’s balance as overpaid funds.
- This balance can be applied to future transactions, reducing the amount owed.
By following these steps, you can efficiently manage transactions, payments, and credit balances in CRM Dance. Proper setup ensures accurate financial tracking and a smooth payment process for students and the studio.
Need personalized support?
We are dedicated to ensuring your success and providing the best possible experience. If you have any questions or need assistance, our team is here to help you make the best decisions for your studio.
Contact Us